Beam Rebar — Main cases
This guide exercises Beam Rebar (BeamRebarCmd) in Revit 2027.3, using the installed English interface and real model copies. Open BimSpeed.STR → Beam Rebar → Beam Rebar. This is a different command from Beam Rebar Axis.

Some result and warning messages in this installed build remain Vietnamese. Captures preserve their original text; the surrounding instructions explain their meaning.
English video
Duration 11:08. All 27 chapters use Charon — Google Gemini, directed in neutral American English. Footage, zooms and highlights follow measured speech; English subtitles are available in the player.
English transcript · English subtitles
Prepare and select the scope
Work on an RVT copy. Select every host in a continuous run, then Finish. Replacing reinforcement on only one host can be rejected when the existing bars belong to a larger run. The downloadable models contain results, not empty starting geometry.
Configure Quick Setting, then open Edit details. Review every span: saved span data can differ from quick defaults. The preview does not write reinforcement into Revit.

- Longitudinal bars and stirrups.
- Scope, secondary beams and reinforcement settings.
- Edit details to inspect the configuration before creation.
1. Main bars and stirrup zones
Set quantity and diameter independently for Main top bars / Main bottom bars. Enable additional layers only when required. For the zoned example, use D8 stirrups, A1 = 100 mm at the ends and A2 = 200 mm in the middle. Review end-zone lengths under Stirrup → Distribution. Uniform uses a uniform layout instead of the two-zone interpretation. Select each span in the bottom overview and inspect Geometry and the section tabs.

- Diameter and support offset.
- Spacings and both end-zone lengths.
- Copy actions. Apply to all preserves each target span's end-zone lengths and main-stirrup skip state. Select the target span to check them.
2. Secondary beams, hangers and junction ties
- Open the selector beside Secondary beams. Review preselected elements, remove unwanted ones and click Finish.
- A beam acting as a support belongs in Beams used as supports. Do not assign the same element to both roles.
- Open Edit details → Stirrup → Secondary beams. Confirm the crossing element in the preview: the quick selection counter can remain zero in this installed build.
- Enable Create hanger bars. Recorded example: D16, quantity 2, end extension 300 mm.
- Enable junction ties: D8, 5 ties on each side, spacing 50 mm and offset from the secondary-beam face 50 mm.


- Hanger bars.
- Dense ties and face offset. Toggle each group to compare its preview effect, then restore the required configuration.
3. Wide beams: vertical and closed inner ties
The example beam is 1200 × 500 mm with 6D18 main bars at the top and bottom. Finalize longitudinal bar positions before assigning inner ties.
Under Stirrup → Additional:
| Type | Diameter | Position | Action |
|---|---|---|---|
| Vertical tie | D8 | 2 | Add |
| Vertical tie | D8 | 5 | Add |
| Closed inner tie | D8 | Start 3, End 4 | Add |
Select a listed tie before Modify or Remove. Under Shapes, choose the main and inner stirrup shapes independently, then the hook arrangement. The recording compares closed/U options and returns to the closed layout with the 135° hook option. Check support and midspan sections.


This run created 430 new Rebar elements. That is not a whole-model quantity.
4. T2 support bars and B2 span bars
Enable T2/B2 in Quick Setting first. In the detailed additional-bar page, select a row to edit its fields. Add creates a row; Delete removes the selected row; Delete All clears the list. Check start/end positions, end types and lengths after each change.
| Recorded case | Layer and bars | Ratios | Displayed result in this fixture |
|---|---|---|---|
| Top bars over the internal support | T2, 2D14 | left/right 0.25 | about 1551 mm each side |
| Bottom bars within the span | B2, 2D14 | end ratios 0.125 | total about 4646 mm |
| Length comparison | B2, 2D14 | left 0.125 → 0.15 → 0.125 | compare the recalculated length and preview |
These lengths depend on the fixture geometry. Enter a complete valid decimal: this build can reject intermediate text while a decimal is being typed.


5. Deep beams and side bars
Open Anti bulge rebar. The recorded 800 mm deep beam uses minimum eligible height 700 mm, D14 side bars, D8 cross ties, spacing 400 mm and anchorage 100 mm. Compare row counts 1 → 2 → 1. Zero rows omits this group. A 500 mm deep beam does not qualify with the same 700 mm threshold.


The deep-beam run, including T2/B2, created 250 new elements. After increasing rows or reducing spacing, inspect the actual positions and density in Revit.
6. Small and larger stepped beams
Select all three hosts and enable Lowered / stepped beam. These examples use 3D18 top/bottom and no additional layers. Geometry reads dimensions from Revit; change the host model to alter dimensions or elevations.
| Fixture | Middle-span drop | Middle top/bottom elevations | Result |
|---|---|---|---|
| Small step | 25 mm | 3575 / 2975 mm | 102 new Rebar elements |
| Large step | 100 mm | 3500 / 2900 mm | 130 new Rebar elements |
The recorded Maximum step for bent bars setting is 50 mm. Compare continuity in the small-step case with separate bar ends and anchorage at the larger step. Inspect the actual support joint in both cases.


7. Anchorage, cover and spacers
In Reinforcement settings, review separate anchorage factors for columns, beams, walls and foundations. The recording shows top factors 30D and bottom factors 10D, cover 25 mm and clear layer distance 25 mm. Under Add Setting, the recorded bar spacers are D25 @ 2000 mm. C-stirrup spacers are an alternative with their own diameter and spacing.


8. Drawing settings and observed limitation
Enable Create drawing sheet, enter Sheet Number / Sheet Name, choose Drawing template and open …. Review Drawing / Detail / Section / Saved templates. Select a suitable title block, view templates, view family types, scales, dimension styles and every tag family required by enabled options. The layout preview is schematic, not an exported sheet.

Verification status: the stepped fixture lacked some required families/templates, so Apply reported missing information. On the richer practice model, the command opened a sheet and displayed a creation report, then raised Object reference not set to an instance of an object. A persistent sheet result was not confirmed after that error. This drawing case is not documented as a successful run, and the download contains no verified drawing-sheet result. Recheck Project Browser after an error before saving or rerunning; report a reproducible failure of the installed build.
9. Multi beams — independent extra hosts
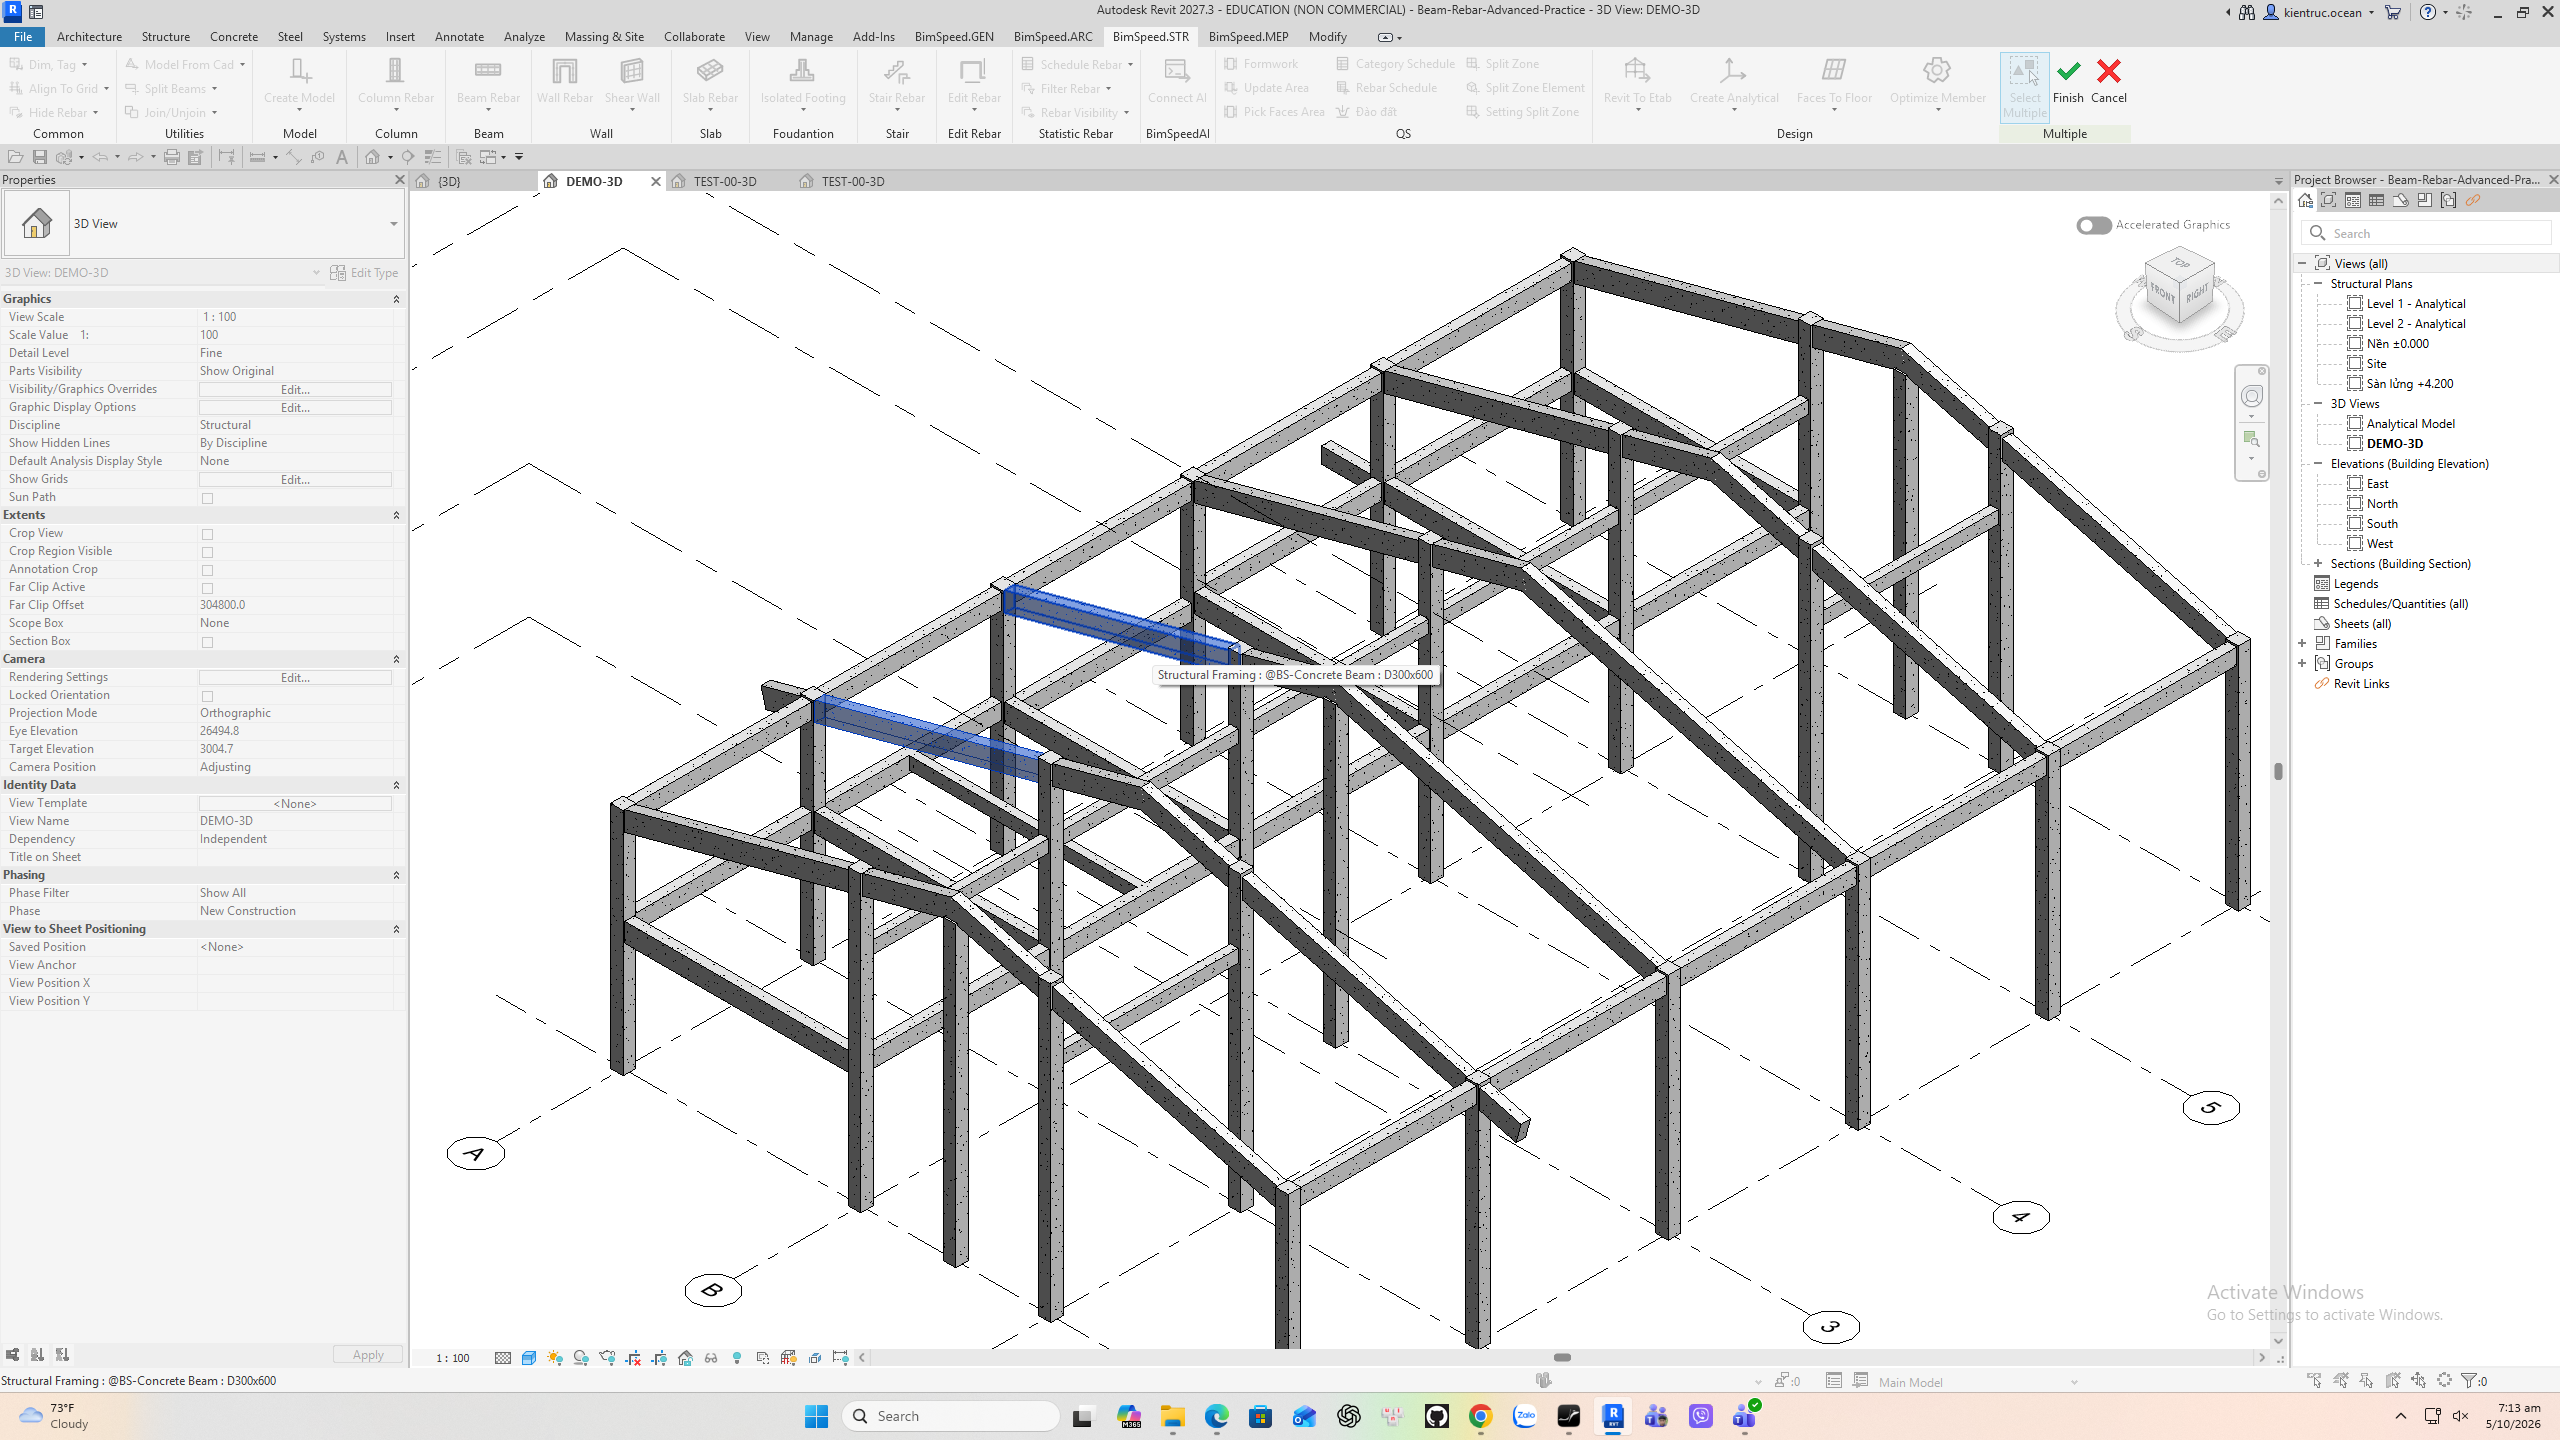
Select the base beam, switch Create drawing sheet off, and configure the example with 3D18 top/bottom and zoned D8 stirrups at 100/200 mm. Click Multi beams, select the extra hosts and Finish. Each extra host is processed as an independent run. This does not replace complete selection of a continuous run.
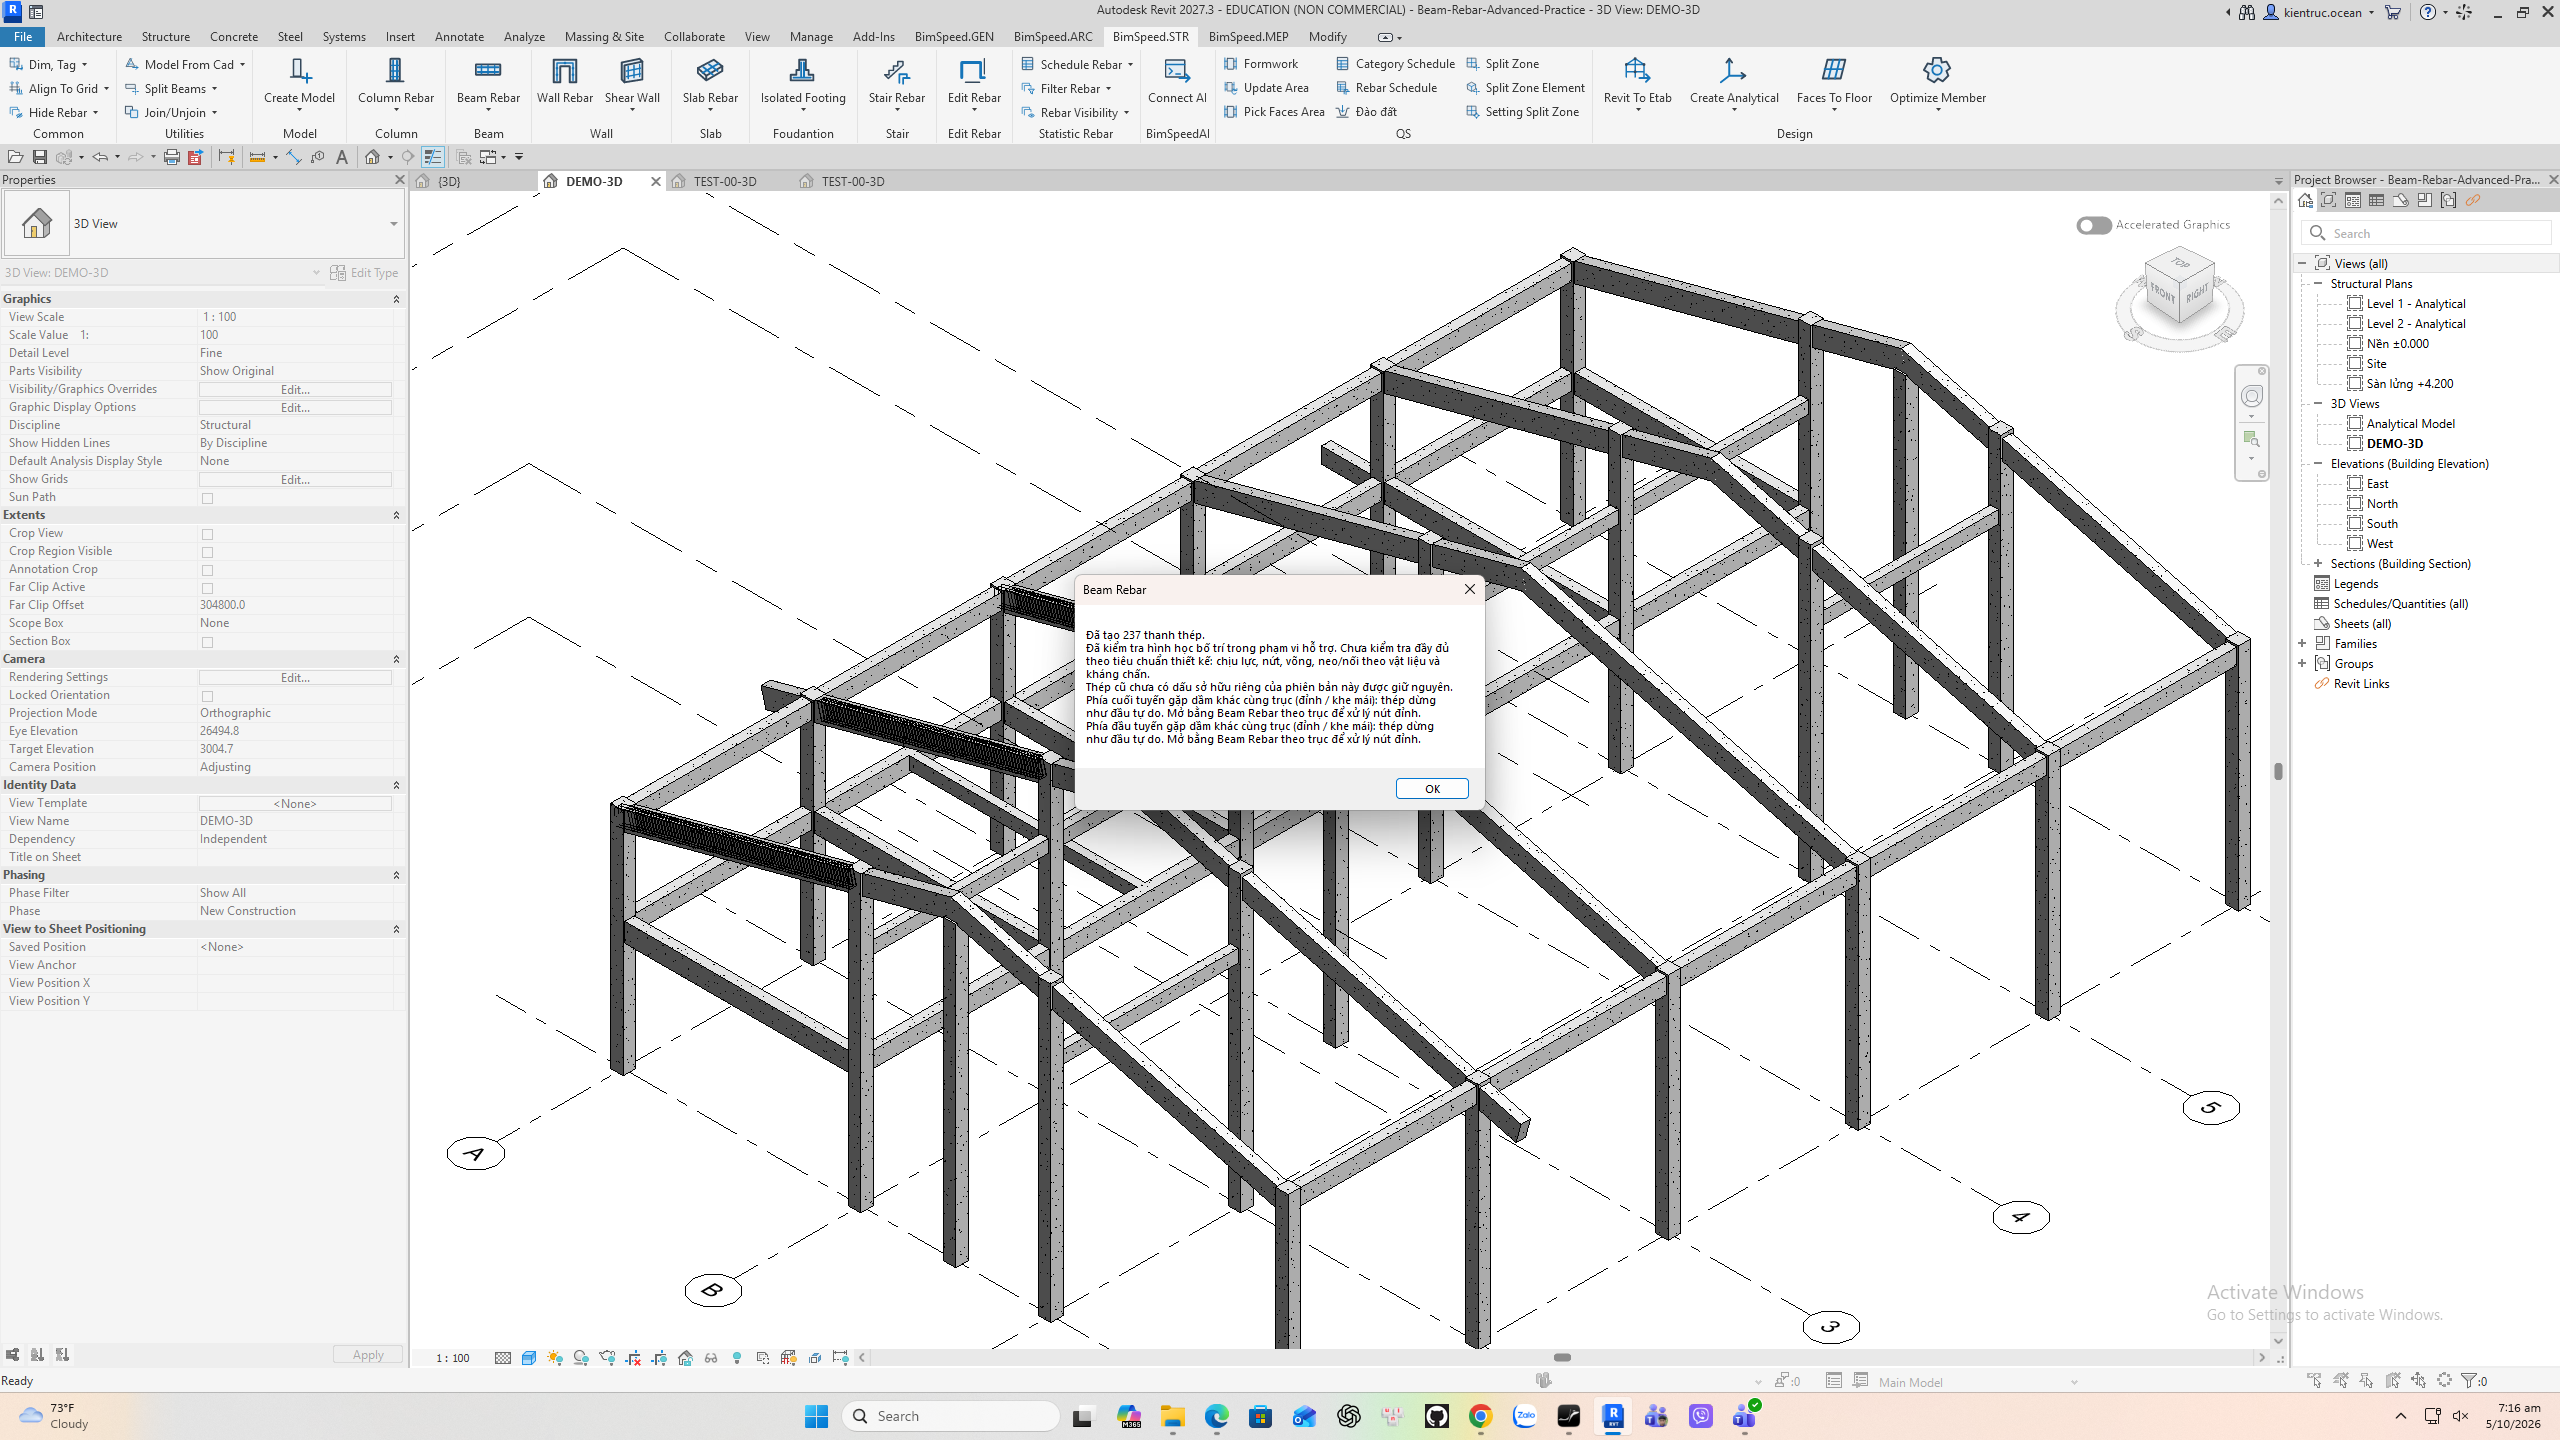
The recorded batch created 237 new elements. Its report warns that a meeting beam on another axis is treated as a free end and directs that junction to Beam Rebar Axis. Inspect and resolve or accept that limitation before using the result.
Verify, save and practice
The creation report states that older bars without this version's ownership marker are retained. Check overlapping reinforcement, hosts, diameters, quantities, spacing and anchorage in Revit. Saving settings, Create reinforcement, and Ctrl+S to save the RVT are distinct actions.
Check actual element Properties
Select a stirrup set in the model. This capture shows D8, 135° hooks at both ends, Maximum Spacing, Quantity 17, and actual spacing 96.9 mm. With a maximum-spacing layout, actual spacing can be smaller than the configured 100 mm. These values describe the selected set, not the entire run.

Download three Revit 2027 result models and README.
- Advanced: open DEMO-3D and find the three separate beam runs below the main frame.
- Small/Large Step: open TEST-00-3D.
- Reported quantities are new elements created in the recorded run. Older fixture reinforcement may remain.